Module 3
Repairing Your Piece
Filling in Cracks & Holes, Repairing or Replacing Broken Areas
NOTE: Click on the the name of the product to be taken to Amazon or similar online market. Most are affiliate links for your convenience. Watch for: “TIP:” if you want the inside scoop from experienced flippers. For a more detailed look at products mentioned, go to Module #1, Prep and Repair Tools & Products.
***Bondo Automotive Body Putty - a resin and the catalyst is mixed together to create a filler that is rock hard and can be shaped and sanded. It heats up as you mix it because of the chemical reaction taking place.
- Clean out the area that needs filling - make sure it is totally dry.
- If the space you are filling is fairly deep, add staples, screws or nails to the area to give the putty something to grab onto, yet is still below the finish area. You may want to pre-drill. Strategically place them so they aren't in the way of anything you might attach to that repaired area.
- Kneed the tube of hardener to be sure it's mixed up before adding it to the putty.
- Fold in the hardener.
- Apply to the area you are filling in. It will start thickening as you apply.
- Shape it as soon as it is hard enough first with your putty knife and then with a chisel.
- After it's hardened, sand it smooth.
CAUTION - Wear a respirator, have good ventilation, especially when sanding. Don't touch the putty with your hands (wear gloves) for both parts of the two part mixture can be dangerous to your health.
TIPS: If you run out of the tube of hardener, you can buy more. Before adding the hardener, kneed it in the tube to make sure it's mixed up well. Be sure the temp is above 65 and below 80 before using it. The mixing ratio is a golf ball size of putty to an inch of hardener. After mixing, you'll have to work quickly because it hardens within a few minutes.
Excellent Bondo video by Craig Shotwell >>> https://youtu.be/zXEsvErcvFY
Durhams Rock Hard Putty - This is an inexpensive wood filler that has high recommendations from furniture flippers. Durhams can be used in molds.
Mix the powder with water and use a metal scraper to apply it. It doesn't shrink much if at all, so put it on, let it dry and sand off any extra. See video below.
TIPS: Make sure your piece is clean and not too shallow, though filling scratches is possible, depending on how deep the scratch goes. If it is very shallow, you may be able to just sand it out.
Some reviewers say to expect some shrinkage with wood putty so compensate by overfilling just a bit and then sand it down. The only caution I have with that advice is the fact that Durhams dries ROCK HARD and will be hard to sand down. Practice a bit if using that product till you get the hang of it.
If you prefer working with a liquidy type of filler, consider Retique It's Mud Filler. It's easy to work with. We use either product depending on the piece we are working on and our preferences at the time.
Add very little water to start with if using Durhams. It dries quickly and hard, but you can sand it easily and it sticks well. If you keep the canister top on tight, the putty powder will last a long time.
Gluing Cracks in Wood Pieces
Two methods:
- Apply glue on top of crack and use a shop vac underneath to draw the glue down through the crack.
- Clamp until dry.
OR:
- Apply glue on top of crack and use tape to shimmy the glue down into the crack.
- Clamp until dry.
Replacing Broken or Missing Pieces With a DIY Mould
Create a mold to duplicate a missing piece:
- Lightly coat the piece you’re molding using a cotton ball and WD40.
- Make a mold by covering the detail or trim entirely with a thick coat of silicone molding putty. If you make the mold too thin it will tear when you try to peal it off.
- Once your silicone has setup, carefully remove your new mold.
- Lightly coat the inside of the mold with cooking spray or WD40 and fill with Bondo Body Filler (a 2 part mix sold as automotive body filler).
- Let the Bondo setup until hard, about 20 minutes.
- Once the Bondo has setup, carefully remove your new trim or overlay piece.
- If you need to trim off some of the Bondo use a razor blade and trim off the excess and then sand any rough edges that are left.
- Glue on your new piece using Bondo or another strong glue like Gorilla glue or wood glue.
If you prefer to buy a kit, Amazon has an EasyMold Silicone Putty kit.
Fixing Missing Veneer, Large Gouges or Chips
Bondo body filler dries rock hard and is great for filling in large spaces or sculpting to repair details.
- Mix the Bondo and apply.
- Sand any areas where the Bondo overlaps or is rough.
- A rotary tool works great for shaping details.
Replacing or Completing By Sculpting
It is possible to sculpt the new piece with a Dremel tool. Dremels come with attachments that you can use to shape and sand. In this case, we are replacing a broken off piece of a rounded foot from a coffee table. A photo tutorial is below the 6 steps. A video of the sculpting process is first, with photos after.
- Assess the area that needs fixing - in this case, a round foot.
- Cut out a block close to the size needed to replace the broken piece.
- Apply glue to the piece and clamp it to the wood in the missing area.
- Choose an attachment that will allow you to grind/sculpt the new piece.
- Measure the non-broken sides for a reference.
- Turn your measuring tool around the piece you have sculpted to be your gauge as you sculpt.
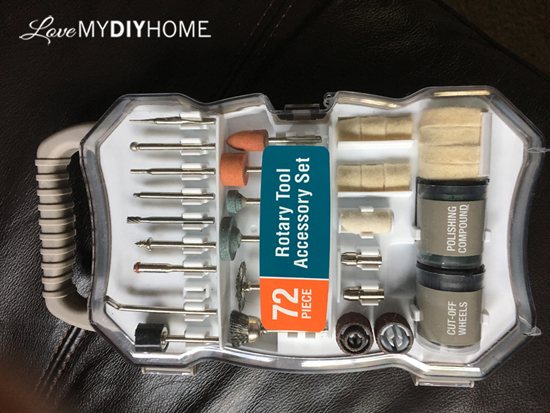
Rotary tool accessories.
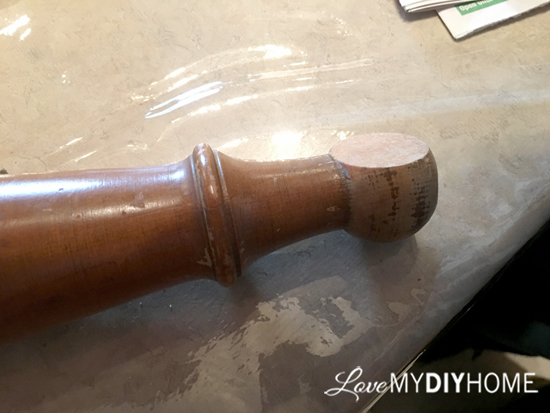
Broken foot from coffee table leg.
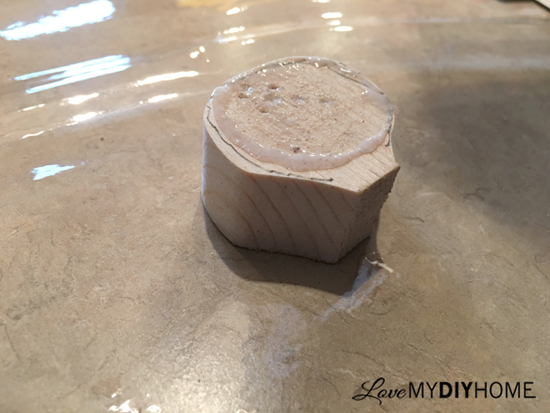
New piece of wood being glued in place of the missing piece.
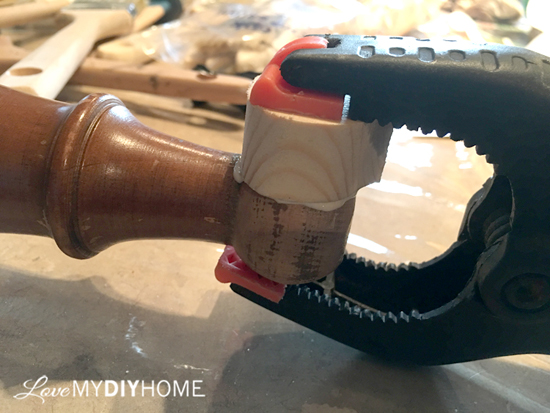
Clamp piece in place and let dry.

Measure width of non-broken part of ball foot.
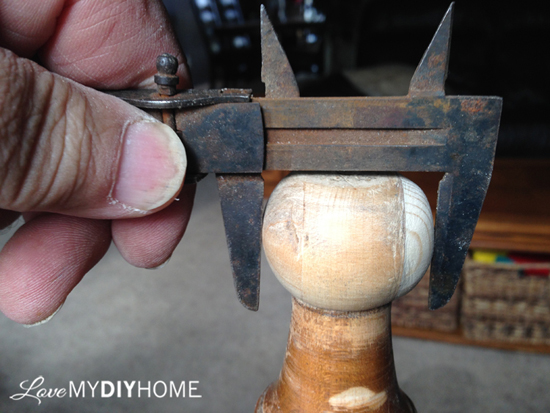
Use same measurement to check your added piece after rounding it off by sanding to make sure it matches.
For more information on using a rotary tool, go to the monthly bonus section for tutorials by Isaac Jones:
April 2021 Monthly Bonus: Power Tools Overview: Rotary Tools Part 1
June 2021 Monthly Bonus: Power Tools Overview: Rotary Tools Part 2
September 2021 Monthly Bonus: Power Tools Overview: Defining with Rotary Tool + Specialty Tools
For information on replacing/repairing window glaze: December 2018 Monthly Bonus: The Lost Art of Window Glazing